ClicktoFax User Guide
Table of Contents
- Sending a Fax
- Receiving a Fax
- Search for Fax in Web Interface
- Viewing a Fax in Web Interface
- Changing User Settings (Password/Notifications)
Sending a Fax.
There are three easy ways to send a fax through ClicktoFax.
- Fax directly from document with ClicktoFax Print Driver
- Fax using Microsoft Outlook
- Fax using ClicktoFax web interface
Faxing through Print Driver:
- Install the Windows Printer Driver (Instructions Here)
- Open the document you want to fax.
- Click on Print and choose ClicktoFax as the printer. Hit Ok.

- Enter Login information if needed.
- Enter the recipient information into the cover page info screen. By clicking on the icon next to the fax number, you are able to access your address book if needed.
- Chose the cover page you want to send with.
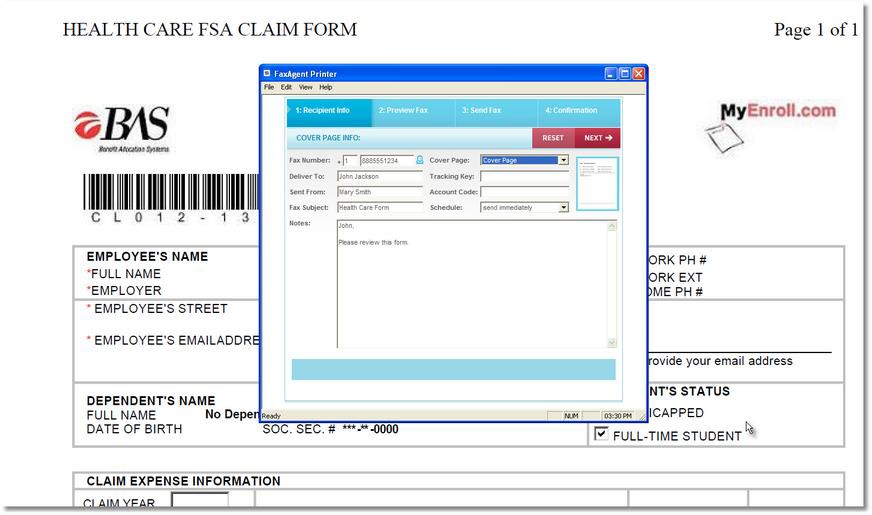
- Hit Next to preview the fax.
- Hit Next. You now have the option to put the fax in a particular ‘Type’ or ‘Folder’ and add any notes.
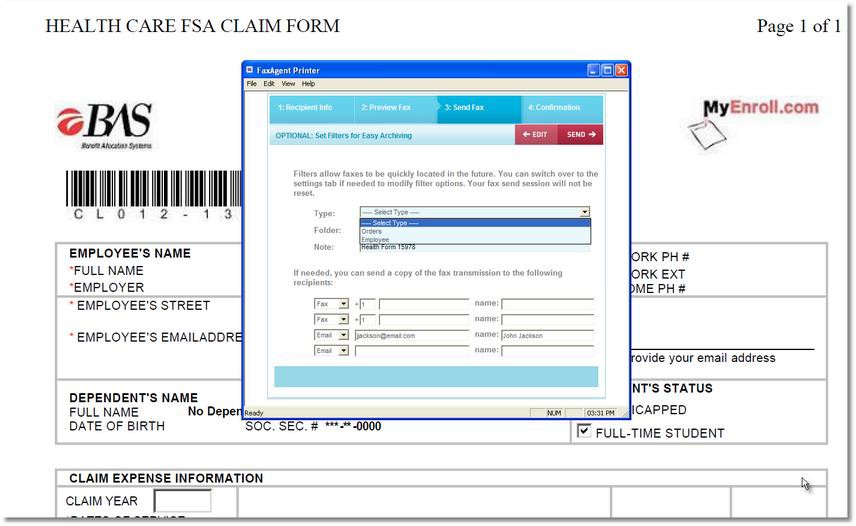
- Enter additional recipients via fax or email if needed. Hit Send.
Faxing using Microsoft Outlook:
- Open a new mail message.
- Enter the recipient fax number @ClicktoFax.com (ex: 18885551234@fserver.clicktofax.com) in the recipient field.
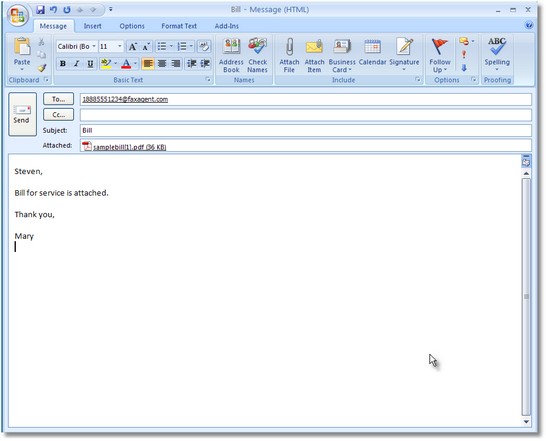
- The subject of the email will be the subject on the cover sheet.
- The body of the email will be the cover pages notes you want to send.
- Attach the file you want to fax.
- Hit Send.
Faxing using ClicktoFax web interface:
- Use your ClicktoFax username and password to enter the website.
- Click on Send on the top right-hand corner of the page.
- Enter the recipient information into the cover page info screen. By clicking on the icon next to the fax number, you are able to access your address book if needed.
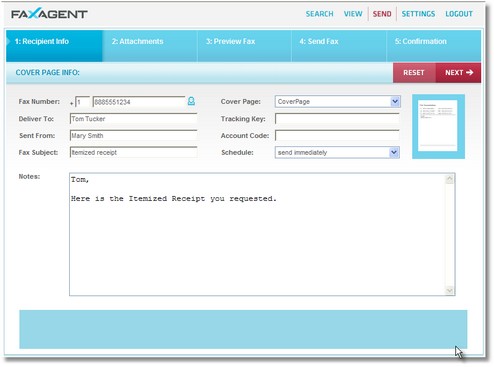
- Chose the cover page you want to send with. Any information input on this screen will be generated on the cover sheet.
- Hit Next and Browse for the file you want to fax.
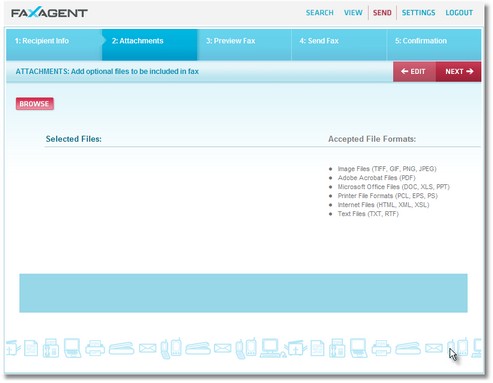
- Hit Next to preview the fax.
- Hit Next. You now have the option to put the fax in a particular ‘Type’ or ‘Folder’ and add any notes.

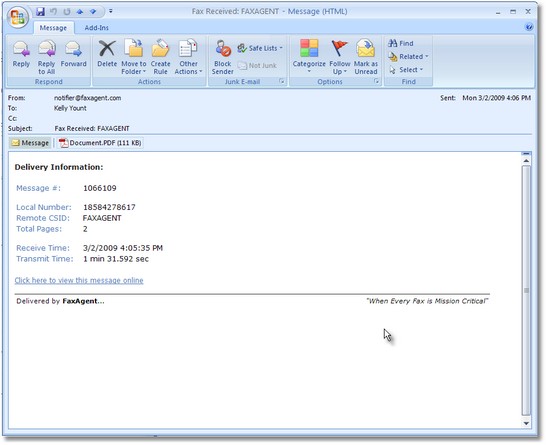
Viewing the fax from your email inbox:
- When you receive a fax, a notification will be sent to your primary email address.
- Open the Tiff or PDF attachment to view the fax.
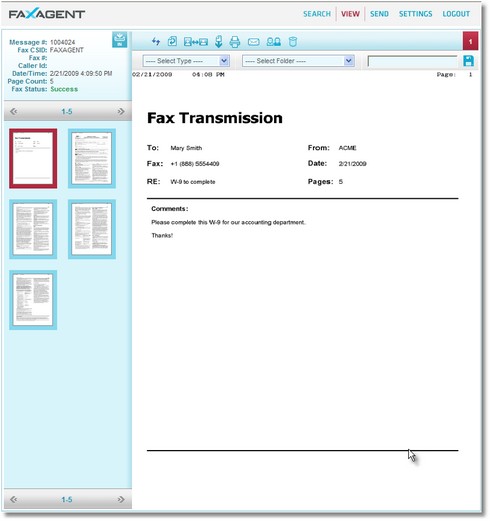
View the Fax in the ClicktoFax web interface:
- Use your ClicktoFax username and password to enter the website.
- Click on the drop-down menu on the top left-hand corner of the screen and chose Incoming faxes.
- Click on the thumbnail of the fax you would like to view.
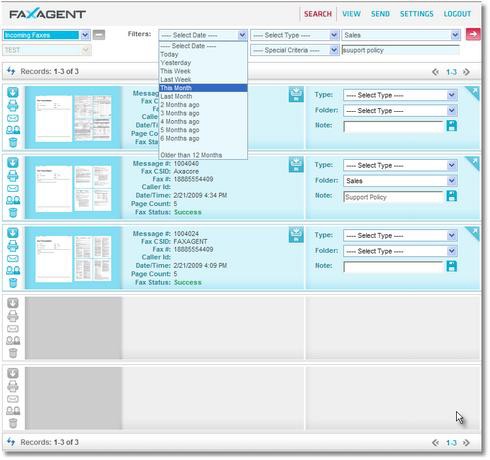
Search for a Fax:
Use the filters on the top of the screen to find your fax faster.
- From the top left hand side of the screen, chose from the drop down the type of fax you are looking for (incoming, outgoing, deleted, etc)
- Select the appropriate filter (date, type, folder) and then click the red arrow to narrow your search.
- Click on the plus sign icon next to the drop down menu to detail your search even more. This will expose an area to search on the notes section of each fax. Once again, click on the red arrow to narrow your search.
Viewing Options:
From the viewing screen you have several options:
- Refresh the page
- Correct the page orientation
- Download the fax as a PDF
- Print preview
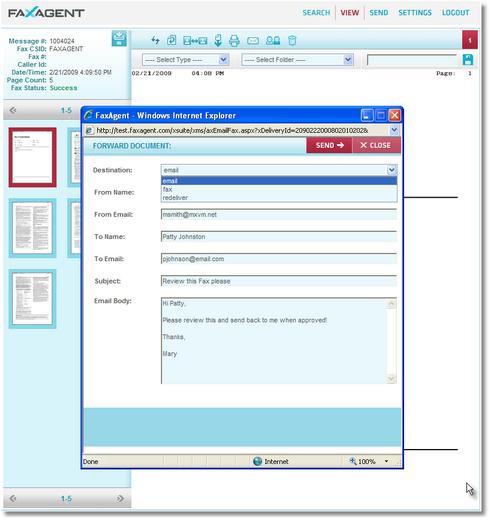
- Forward the fax on to another recipient as an email or a fax
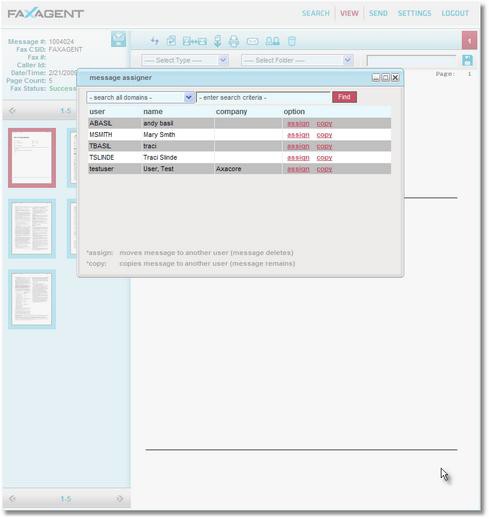
- Assign or copy the fax to another user within your organization
- Delete the fax
User Settings:
The Settings tab allows the user to customize their profile and account settings.
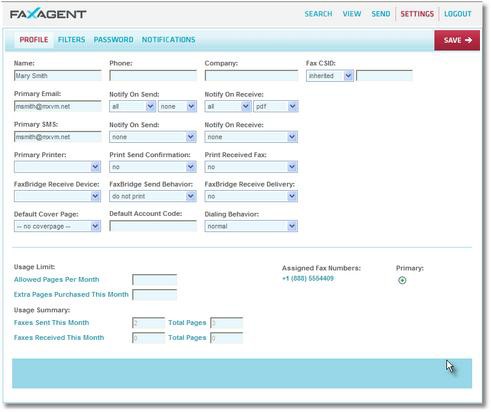
Profile Tab:
- Enter in your name, Phone, Company, and Primary email that you would like the fax notifications to be sent.
- Choose how you would like to be notified.
- Notify on send- When you send a fax, choose if you would like to be notified of successful transmissions only, failed transmissions only, or if you would like to be notified on both. Next, choose how you would like to receive the notification: with a pdf attachment of the fax sent, with a tiff attachment of the fax sent, or no attachment.
- Notify on receive- When you receive a fax, choose if you would like to be notified of successful transmissions only, failed transmissions only, or if you would like to be notified on both. Next, choose how you would like to receive the notification: with a pdf attachment of the fax sent, with a tiff attachment of the fax sent, or no attachment.
- You have the option of being notified via SMS. If you choose to do so, enter in the primary SMS and how you would like to receive those notifications.
- Chose the default cover page you would like to send with your faxes.
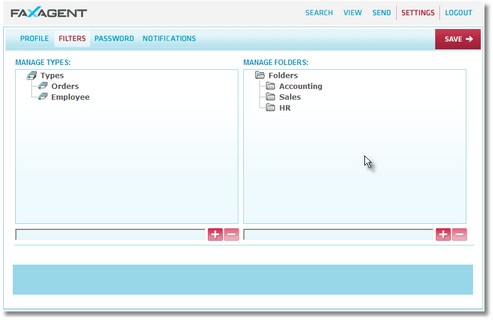
Filters Tab:
- Set Types of faxes and Folders under the filter tab.
- Type in the particular type you want and click on the plus sign icon. This will add it to the list of types or folders. To delete a type or folder simply click on the name and click on the minus sign icon.
- To create sub-folders, click and drag a type/folder name into the appropriate folder
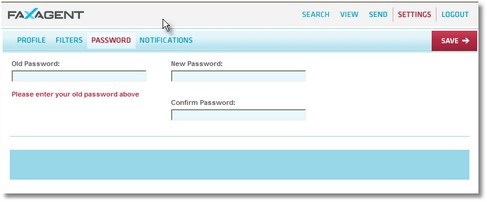
Password:
- To change your password, enter in your old password and then your new one twice.
Notifications:
- Standard Notifications- if you would like to receive an additional notification via email or SMS, enter the information in this section.
- Advanced Notifications- Please see your system administrator to set advanced notifications.
- Account Code notifications- Please contact support for account code setup